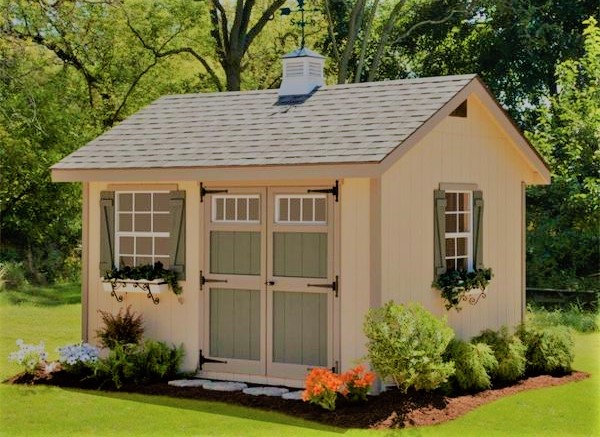
The idea of having a shed in your backyard where you can store your tools, work on projects, or simply escape for a while is quite appealing. With the advent of DIY shed kits, creating your dream shed has become more accessible than ever. These kits aim to simplify the building process, offering a practical solution for those who might not have extensive construction experience. This comprehensive guide will walk you through everything you need to know about building your dream shed using a DIY kit.
Understanding DIY Shed Kits
A DIY shed kit is essentially a package that contains all the materials you need to construct your shed. These kits vary in complexity, size, design, and the materials they are made from, accommodating a wide range of preferences and requirements. Typically, a kit includes pre-cut wood or metal pieces, roofing materials, doors, and windows. The best part? You also get detailed instructions to guide you through the assembly process.
Why Choose a DIY Shed Kit?
- Cost-Effective: Building a shed from scratch requires buying materials separately, which can often become more expensive. Kits are designed to provide all necessary materials in one package, reducing overall costs.
- Time-Saving: Since parts are pre-cut and designed to fit together seamlessly, much of the guesswork and time-consuming aspects of shed building are eliminated.
- Customizable: Many manufacturers offer customization options allowing you to modify the design according to your needs, whether it’s adding extra windows, shelving, or choosing a different color scheme.
- Achievable: With comprehensive instructions, building a shed from a kit is achievable for people with basic DIY skills and tools.
Choosing the Right Shed Kit
When selecting a shed kit, consider the following factors to ensure you choose the right one for your needs:
- Size: Think about what you will be using the shed for and ensure it’s adequately sized to accommodate your needs.
- Material: Wooden sheds offer a classic look but require maintenance to protect against rot and pests. Metal sheds are durable and low maintenance, while plastic sheds are lightweight and resistant to decay.
- Design: Look for a design that complements your house and garden. Customization options can help you achieve the desired look.
- Budget: Set a budget beforehand and find a kit that offers the best value within your price range.
Step by Step Process
Building a shed from a DIY kit can be broken down into manageable steps. Here’s a simplified overview:
- Preparation: Before purchasing your shed kit, check local building codes and HOA rules to ensure compliance. Once your kit arrives, organize all materials and read the instructions thoroughly.
- Foundation: A sturdy foundation is crucial. Depending on the kit, you may need to lay concrete piers, a concrete slab, or use a timber floor frame.
- Assembly: Start the assembly process by constructing the floor, followed by the walls, and then the roof. Ensure all components are level and securely fastened.
- Roofing and Siding: Apply the roofing materials as instructed, followed by the siding, ensuring everything is waterproof and secure.
- Finishing Touches: Install doors, windows, and any additional features like shelving or workbenches. Finally, paint or treat your shed according to the material and your personal preference.
Tips for Success
- Take Your Time: Don’t rush the process. Careful reading of the instruction manual and precise assembly will yield the best results.
- Safety First: Always use appropriate safety gear and be cautious when using tools.
- Ask for Help: Some steps may require an extra set of hands. Don’t hesitate to ask a friend or family member for assistance.
- Maintenance: Regular maintenance will keep your shed in top condition for years to come.
Constructing a shed from a DIY kit can be a rewarding project that adds value to your home and provides a functional space for your hobbies and storage needs. With careful planning, the right tools, and a bit of elbow grease, your dream shed can become a reality.


Leave a comment