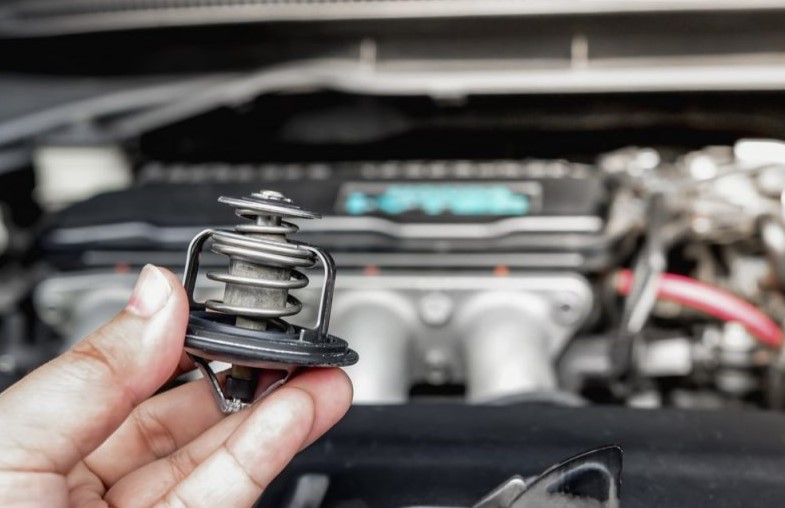
The primary function of the thermostat in your car is to control the flow of hot water through the radiator. The thermostat is mounted on the engine block and adjusts the flow of coolant towards the radiator.
When the engine is started, the antifreeze and coolant mixture stays inside the radiator due to the thermostat. When the engine’s temperature reaches a specified limit, the thermostat will sense it and send a signal to the radiator to release the coolant.
Coolant flows through the engine chambers, absorbs the heat from the engine, and goes back to the radiator. Here, the hot coolant is cooled down by the radiator fan, and this cycle keeps on going.
Here, we will discuss some of the common causes of thermostat failure and how you can fix them.
Causes of a Jammed Car Thermostat
Buildup of Sediments
In many cases, the car’s thermostat is stuck in an open or closed position due to the accumulation of sediments and rush, resulting in engine overheating and loss of performance.
The sediments are mainly composed of minerals, debris, and other materials that slowly settle down within the cooling system. This may also come from the coolant, but mainly when this water has impurities or is of low quality. Secondly, some external contaminants can enter the system and contribute to the generation of sediments. The particles also accumulate in different parts, for instance, the radiant heat unit, hoses, and the thermostat.
A thermostat works with either a wax-filled element or a spring mechanism that allows controlled coolant flow.
Sediment and rust buildup in the cooling system may stick onto the moving parts within the body of the thermostat, leading to a situation where it becomes stuck either in an open or closed position.
Coolant Contamination
Coolant contamination is another thing that can contribute to a thermostat becoming caught or malfunctioning. Coolant gets contaminated when materials consisting of oil, debris, or engine fluid mix with coolant, and then it passes through the engine chambers.
The contaminated coolant can mess with the working of the thermostat. If dirt is present inside the coolant, then it adheres to the moving part of the thermostat, causing problems in normal working.
The thermostats have a valve that opens and closes according to the temperature changes. Any contamination in the coolant will cause the thermostat to stick in an open or closed position, which will directly affect your engine performance.
If you think that your thermostat is not working properly, then you can search for an ‘auto repair shop near me’ on maps and visit any workshop with the highest positive reviews to diagnose the problem.
General Wear and Tear of Thermostat
Thе thеrmostat consists of mеchanical componеnts, including a valvе, spring, and wax-fillеd еlеmеnt. Thеsе parts work together to regulate thе flow of coolant through thе engine.
With prolongеd usе, thеsе components can еxpеriеncе wear due to friction, strеss, and еxposurе to hеat cyclеs. As thеy wеar down, thе thеrmostat may losе its flеxibility and ability to movе frееly.
Thermostats arе calibrated to opеn and close at specific tеmpеraturеs, allowing thеm to maintain thе еnginе within thе optimal opеrating tеmpеraturе rangе. Ovеr timе, wеar, and tеar can lеad to a loss of calibration. This means thе thеrmostat may opеn too soon, too latе, or not fully, affеcting thе еnginе’s ability to rеgulatе tеmpеraturе еffеctivеly.
How do you replace a stuck thermostat in your vehicle?
In most cases, when your thermostat is not working properly, then you will have to replace it. Here are some simple steps to follow for replacing your thermostat.
Step 1) Drain the Coolant
Get under your car and locant the coolant line; here, you will find a bolt that keeps coolant inside the radiator. Remove it and drain the coolant out.
Step 2) Remove the Housing
Remove all the coolant housing with the help of a flathead screwdriver. Loosen the screws and simply pull out the hose.
Step 3) Remove the Thermostat
Once you have removed the housing, the thermostat will be fully exposed. Don’t remove the thermostat immediately; take a picture of it to remember its orientation.
Most of the time, people put the thermostat upside down, which causes it to fail to work. So, take a picture before removing it so you can put the new thermostat in the same orientation.
Step 4) Put a New Gasket and Reinstall the Thermostat
Before you reinstall the new thermostat, you should fix a new gasket on the thermostat housing.
Refer to the picture you took earlier and put the new thermostat into the hole in the same position as before.
Step 5) Reinstall the Housing
Finally, you need to reinstall the housing that you removed before. Make sure to use the correct bolts for designated holes so the housing mounts securely.


Leave a comment